In this tutorial, I will show you how you can leverage odo to develop a .NET application communicating with the PostgreSQL database on OpenShift.
Prerequisites
- odo 3.6.0 or later
oc(OpenShift Client) (Optional, but recommended. Alternatively, you can use OpenShift Web Console to create PostgreSQL instance)- Access to OpenShift cluster
If you don't have access to the OpenShift cluster, you can use OpenShift Sandbox to get access to the OpenShift cluster for FREE.
This is what I used for this tutorial.
- Log in to the cluster using
odo- Log in to the OpenShift Web Console, click on your username in the top right corner and select "Copy login command"
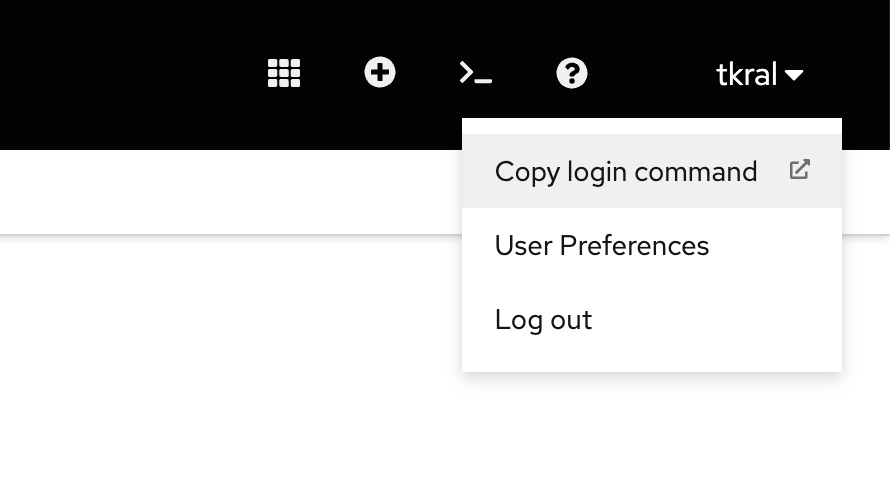
- You might get prompted to log in again. After that, you should be able to display the token.
- Copy
oc login --token=.....command that you see to your terminal, replaceocwithodo, and execute the command. (If you haveocinstalled, you can leave the command as it is.odoandocstore the login information at the same place)
- Log in to the OpenShift Web Console, click on your username in the top right corner and select "Copy login command"
Getting the application source code
We will use .NET Core Sample App for OpenShift
Clone the repository
git clone https://github.com/redhat-developer/s2i-dotnetcore-persistent-exexample output
▶ git clone https://github.com/redhat-developer/s2i-dotnetcore-persistent-ex
Cloning into 's2i-dotnetcore-persistent-ex'...
remote: Enumerating objects: 87, done.
remote: Counting objects: 100% (28/28), done.
remote: Compressing objects: 100% (16/16), done.
remote: Total 87 (delta 20), reused 12 (delta 12), pack-reused 59
Receiving objects: 100% (87/87), 27.93 KiB | 6.98 MiB/s, done.
Resolving deltas: 100% (44/44), done.
Change the directory with the application source code
cd s2i-dotnetcore-persistent-ex/appexample output
▶ cd s2i-dotnetcore-persistent-ex/app

▶ ls
Data  Migrations  Pages  Program.cs  RazorPagesContacts.csproj  Startup.cs
Switch to the dotnet-6.0 branch
git checkout dotnet-6.0example output
▶ git checkout dotnet-6.0
branch 'dotnet-6.0' set up to track 'origin/dotnet-6.0'.
Switched to a new branch 'dotnet-6.0'cautionFor now, we have to use .NET 6.0 as there is no Devfile stack .NET 7.0 in the official Devfile registry yet.
Use odo to develop a .NET application on the OpenShift cluster
In this part, we will start our .NET application inside the container on the OpenShift cluster.
Because the app will be built and run inside the container, we don't need to install any .NET tools on our local system. All we need is the odo CLI and an OpenShift cluster.
Get the Devfile stack for .NET 6.0
The Devfile stack is a definition of the containerized development environment. It defines the container image, the environment variables, and the commands that need to be executed to build, run, and optionally also test, debug and deploy the application.
You can learn more about Devfiles at devfile.io.
Run odo init command
odo init
example output
  ▶ odo init
    __
  /  \__     Initializing a new component
  \__/  \    Files: Source code detected, a Devfile will be determined based upon source code autodetection
  /  \__/    odo version: v3.6.0
  \__/

  Interactive mode enabled, please answer the following questions:
  Based on the files in the current directory odo detected
  Language: .NET
  Project type: dotnet
  The devfile "dotnet50:1.0.3" from the registry "DefaultDevfileRegistry" will be downloaded.
  ? Is this correct? No
  ? Select language: .NET
  ? Select project type: .NET 6.0
  ✓  Downloading devfile "dotnet60" from registry "DefaultDevfileRegistry" [1s]

  ↪ Container Configuration "dotnet":
    OPEN PORTS:
      - 8080
    ENVIRONMENT VARIABLES:
      - CONFIGURATION = Debug
      - STARTUP_PROJECT = app.csproj
      - ASPNETCORE_ENVIRONMENT = Development
      - ASPNETCORE_URLS = http://*:8080

  ? Select container for which you want to change configuration? NONE - configuration is correct
  ? Enter component name: myapp

  You can automate this command by executing:
    odo init --name myapp --devfile dotnet60 --devfile-registry DefaultDevfileRegistry

  Your new component 'myapp' is ready in the current directory.
  To start editing your component, use 'odo dev' and open this folder in your favorite IDE.
  Changes will be directly reflected on the cluster.
odo init command will guide you through selecting the correct Devfile stack and some basic configuration. For purposes of this tutorial, you can just accept the default values.
Please pay attention to the version of the dotnet Devfile that odo suggests.
odo might not be able to detect the .NET version that our application is using correctly.
If that happens, you need to tell odo that it is not correct and select the correct version manually.
Edit devfile
We need to modify devfile.yaml that got downloaded by odo init command to ensure that our application starts correctly.
The default .NET Devfile in the registry assumes that we have app.csproj, but our application uses RazorPagesContacts.csproj.
Open devfile.yaml that is in your project directory in your text editor or IDE.
Find lines that define the STARTUP_PROJECT environment variable.
- name: STARTUP_PROJECT
  value: app.csproj
Replace the app.csproj value with RazorPagesContacts.csproj
- name: STARTUP_PROJECT
  value: RazorPagesContacts.csproj
Complete devfile.yaml after the changes.
commands:
- exec:
    commandLine: kill $(pidof dotnet); dotnet build -c $CONFIGURATION $STARTUP_PROJECT
      /p:UseSharedCompilation=false
    component: dotnet
    group:
      isDefault: true
      kind: build
    workingDir: ${PROJECT_SOURCE}
  id: build
- exec:
    commandLine: dotnet run -c $CONFIGURATION --no-build --project $STARTUP_PROJECT
      --no-launch-profile
    component: dotnet
    group:
      isDefault: true
      kind: run
    workingDir: ${PROJECT_SOURCE}
  id: run
components:
- container:
    args:
    - tail
    - -f
    - /dev/null
    endpoints:
    - name: http-dotnet60
      targetPort: 8080
    env:
    - name: CONFIGURATION
      value: Debug
    - name: STARTUP_PROJECT
      value: RazorPagesContacts.csproj
    - name: ASPNETCORE_ENVIRONMENT
      value: Development
    - name: ASPNETCORE_URLS
      value: http://*:8080
    image: registry.access.redhat.com/ubi8/dotnet-60:6.0
    mountSources: true
  name: dotnet
metadata:
  description: Stack with .NET 6.0
  displayName: .NET 6.0
  icon: https://github.com/dotnet/brand/raw/main/logo/dotnet-logo.png
  language: .NET
  name: myapp
  projectType: dotnet
  tags:
  - .NET
  version: 1.0.2
schemaVersion: 2.1.0
starterProjects:
- git:
    checkoutFrom:
      remote: origin
      revision: dotnet-6.0
    remotes:
      origin: https://github.com/redhat-developer/s2i-dotnetcore-ex
  name: dotnet60-example
  subDir: app
Start the application on the cluster
We have our application source code and the devfile.yaml that describes the environment in which the application should be executed. We can now start the application on the cluster. Just run odo dev in the project directory.
odo dev
example output
▶ odo dev
  __
/  \__     Developing using the "myapp" Devfile
\__/  \    Namespace: tkral-dev
/  \__/    odo version: v3.6.0
\__/

↪ Deploying to the cluster in developer mode
•  Waiting for Kubernetes resources  ...
✓  Pod is Running
✓  Syncing files into the container [2s]
✓  Building your application in container on cluster (command: build) [11s]
•  Executing the application (command: run)  ...
-  Forwarding from 127.0.0.1:20001 -> 8080


↪ Dev mode
Status:
Watching for changes in the current directory /Users/tkral/Code/s2i-dotnetcore-persistent-ex/app

Keyboard Commands:
[Ctrl+c] - Exit and delete resources from the cluster
    [p] - Manually apply local changes to the application on the cluster
odo dev performs the following actions:
- Starts the containers on the cluster based on the information from the
devfile.yaml. - Copies all the source code from your local machine to the container.
- Executes
buildandruncommands as defined in thedevfile.yaml. - When the application is successfully running in the container,
odosets the port forwarding between your local machine and the container to ensure we can easily access our application on the local port. In this case, it is port20001.
Now you can access the application on http://localhost:20001.
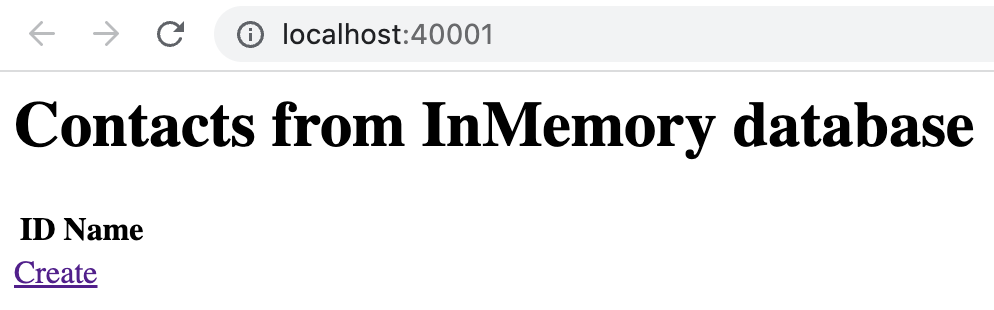
You can see that our application is now using the in-memory database. We will start the PostgreSQL database and connect our application in the following steps.
You can leave odo dev running in the terminal and open a new terminal window to continue with the next steps. Make sure that you run all odo commands in the root folder of our .NET application (where you have devfile.yaml and RazorPagesContacts files).
Use the PostgreSQL database
Start a new PostgreSQL instance on the OpenShift cluster
To start a new PostgreSQL instance on the OpenShift cluster, we can use the postgresql-ephemeral template that is available in the OpenShift cluster.
If you have oc CLI installed, you can use the following command to start a new PostgreSQL instance:
oc new-app postgresql-ephemeral
example output
▶ oc new-app postgresql-ephemeral
--> Deploying template "openshift/postgresql-ephemeral" to project tkral-dev

    PostgreSQL (Ephemeral)
    ---------
    PostgreSQL database service, without persistent storage. For more information about using this template, including OpenShift considerations, see https://github.com/sclorg/postgresql-container/.

    WARNING: Any data stored will be lost upon pod destruction. Only use this template for testing

    The following service(s) have been created in your project: postgresql.

            Username: user2GR
            Password: 6UrRpvC8ups70ffr
      Database Name: sampledb
      Connection URL: postgresql://postgresql:5432/

    For more information about using this template, including OpenShift considerations, see https://github.com/sclorg/postgresql-container/.

    * With parameters:
        * Memory Limit=512Mi
        * Namespace=openshift
        * Database Service Name=postgresql
        * PostgreSQL Connection Username=user2GR # generated
        * PostgreSQL Connection Password=6UrRpvC8ups70ffr # generated
        * PostgreSQL Database Name=sampledb
        * Version of PostgreSQL Image=10-el8

--> Creating resources ...
    secret "postgresql" created
    service "postgresql" created
    deploymentconfig.apps.openshift.io "postgresql" created
--> Success
    Application is not exposed. You can expose services to the outside world by executing one or more of the commands below:
    'oc expose service/postgresql'
    Run 'oc status' to view your app.
If you don't have oc CLI installed, you can use the OpenShift web console to start a new PostgreSQL instance.
Starting new PostgreSQL instance using OpenShift Web Console
- Log in to OpenShift Web Console.
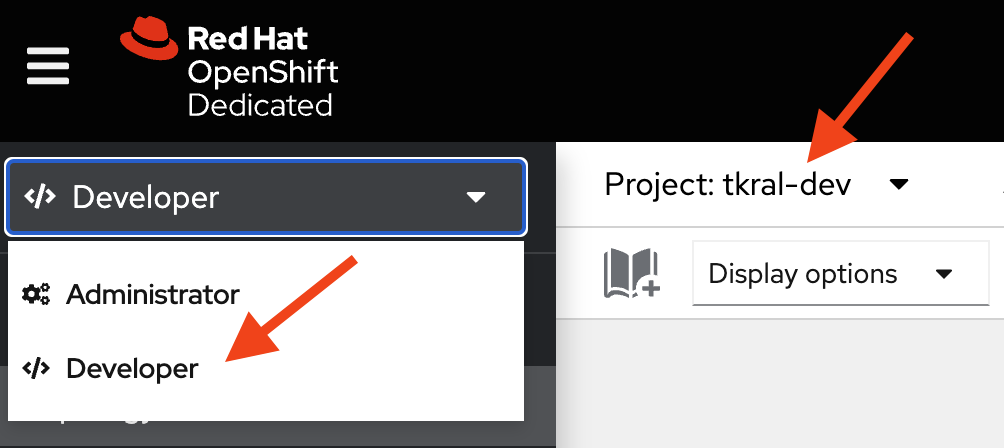
- Switch to the Developer view and make sure that you are using correct project.
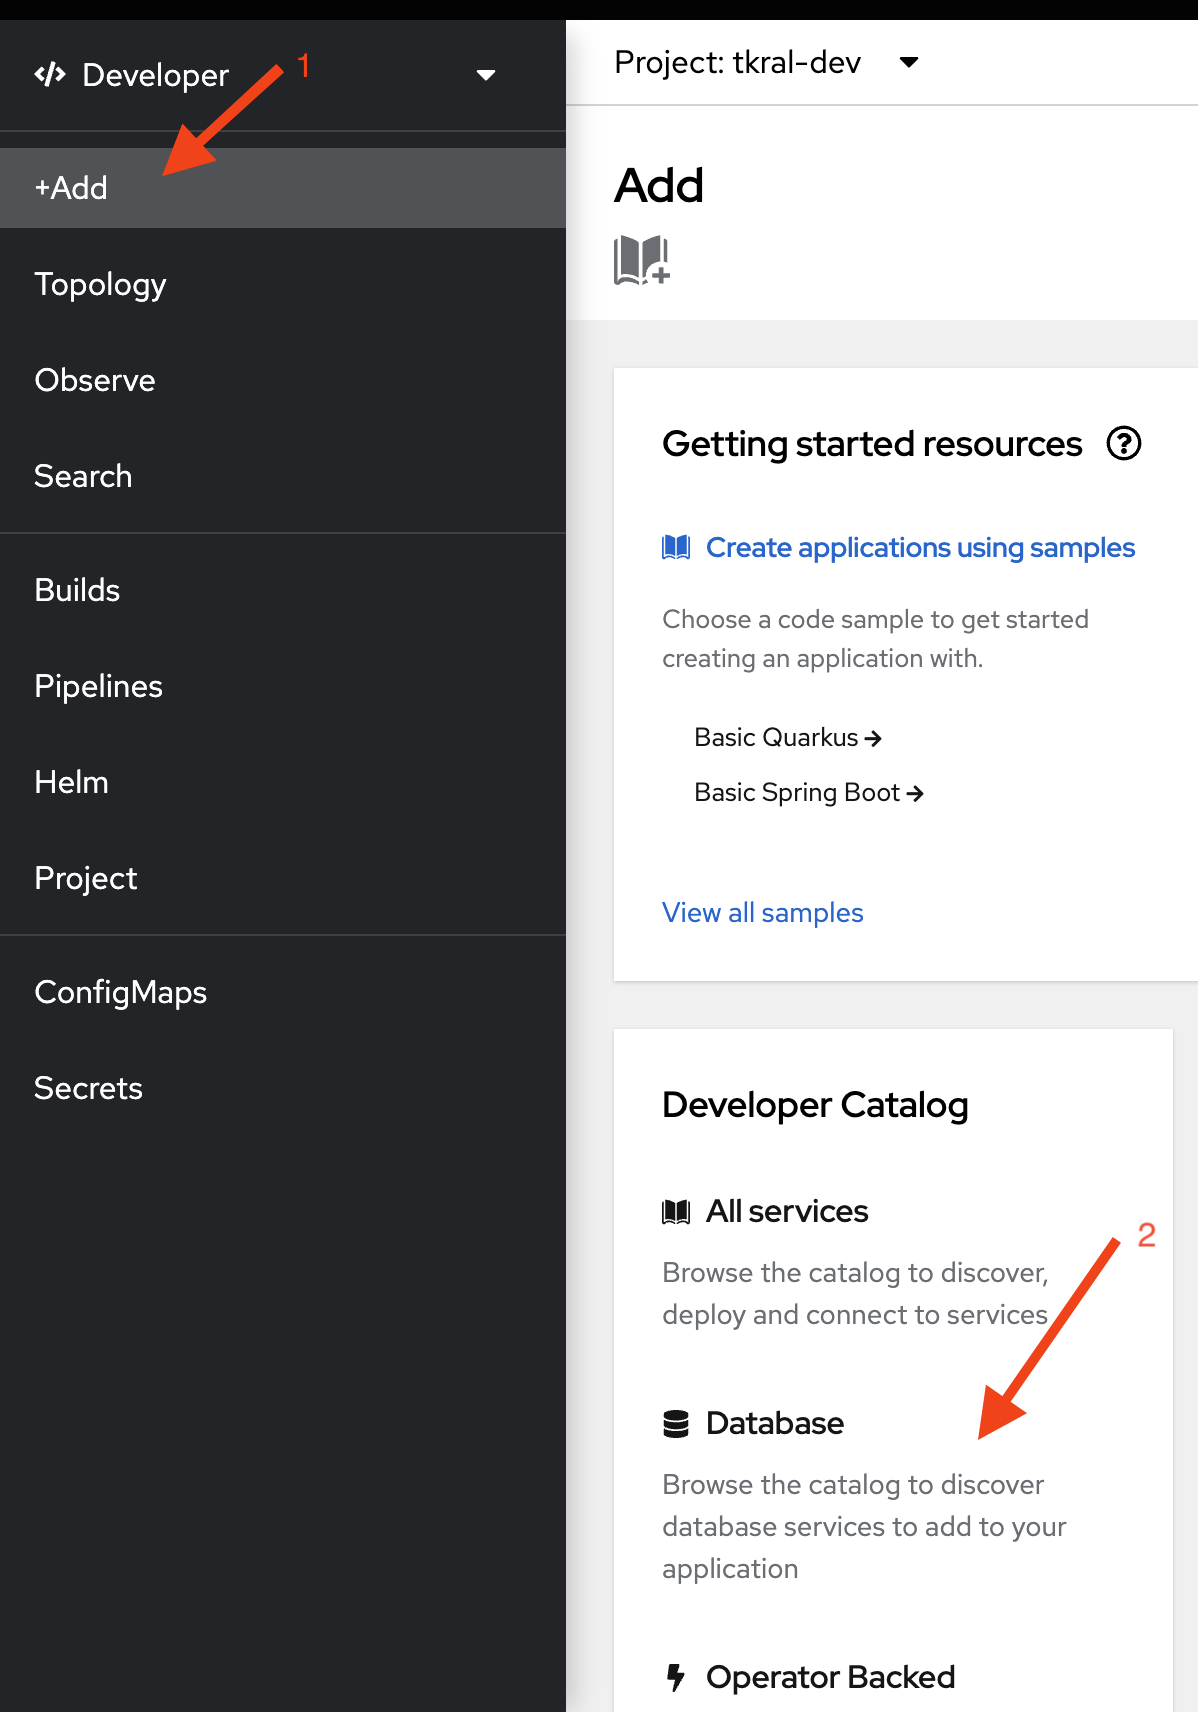
- Click on the +Add button in the main menu and select Database option from the Developer Catalog section.
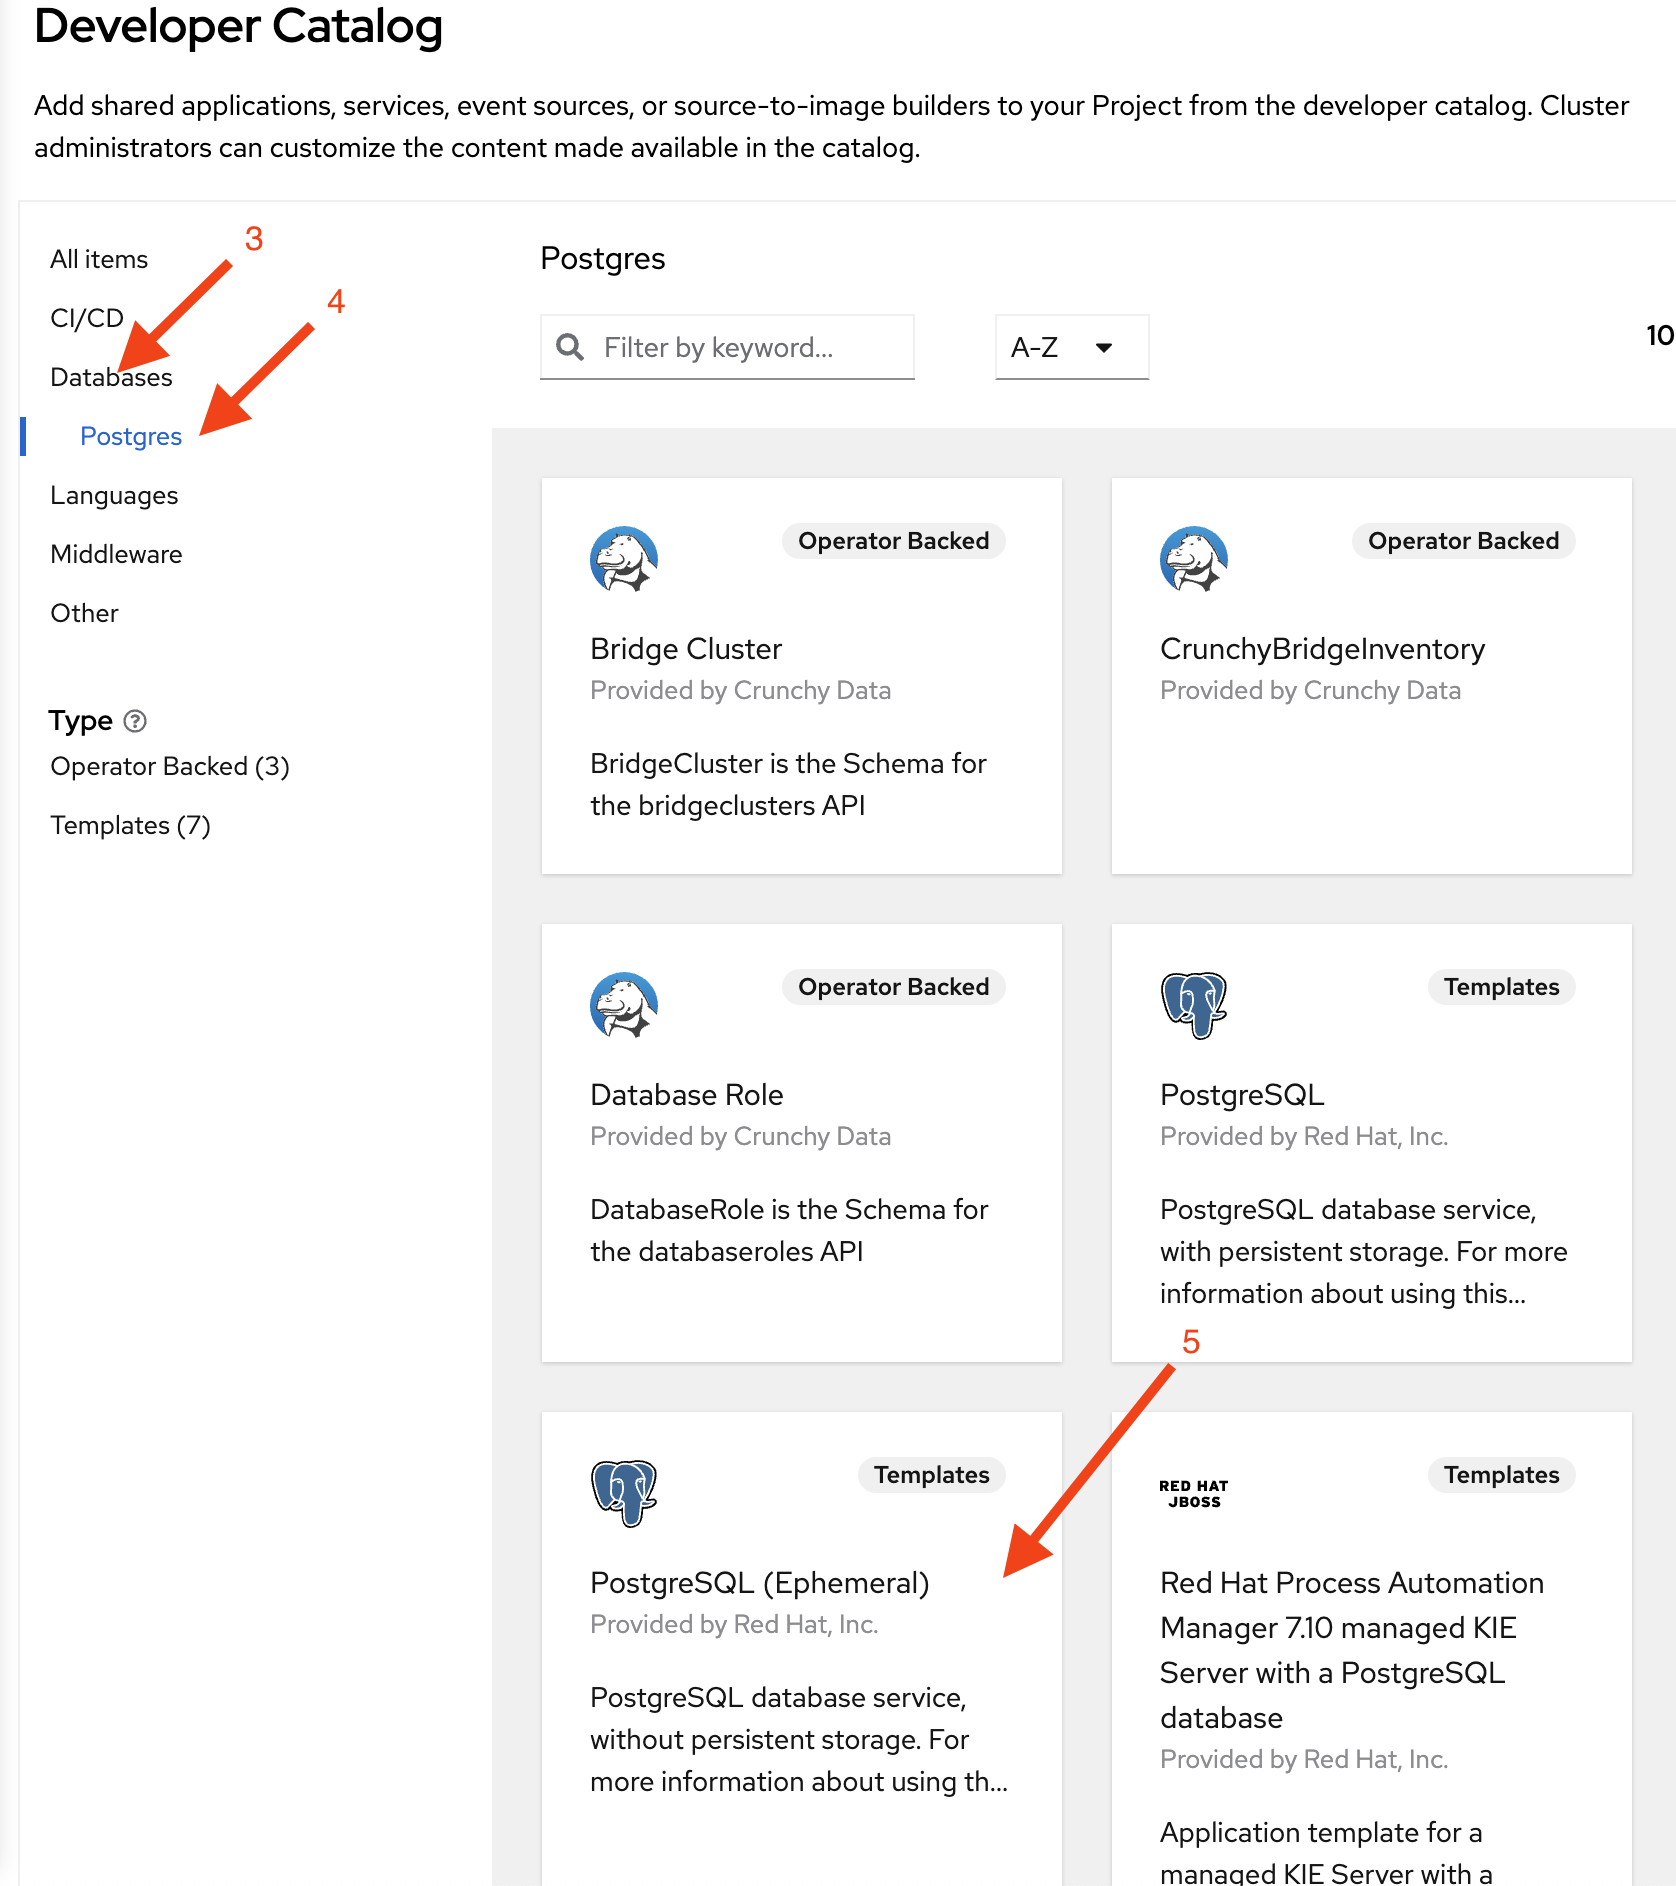
- In the Database section select PostgreSQL option. Make sure to select the one using Templates.
- Click on the Instantiate Template button.
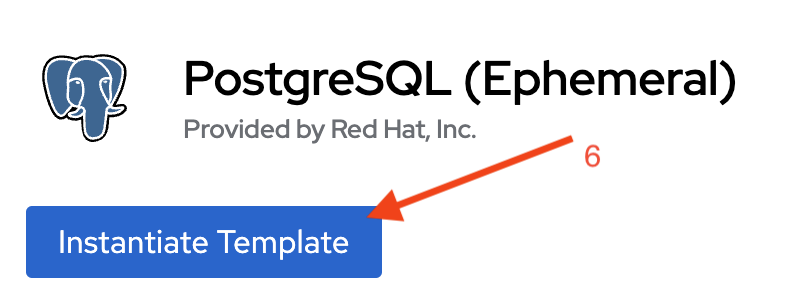
- For our use we can use the default values. Just click on the Create button.

Connect the application to the PostgreSQL
We must ensure that our .NET application can connect to the PostgreSQL instance.
The application already expects the connection information to be available as environment variables.
We will use the postgresql Secret that was created by the postgresql-ephemeral template.
We will use one of the newest odo and Devfile features - container-overrides.
Using this feature, we can modify the container that the Devfile creates.
Open devfile.yaml in the application directory and add the following section to the dotnet container:
attributes:
  container-overrides: {envFrom: [secretRef: {name: "postgresql"}]}
While you have devfile.yaml open, you also need to add a new environment variable called database-service. This variable will tell our application to use the PostgreSQL database instead of the in-memory database.
Add the following lines in to the env section of the dotnet container:
- name: database-service
  value: postgresql
This is how the devfile.yaml should look like.
commands:
- exec:
    commandLine: kill $(pidof dotnet); dotnet build -c $CONFIGURATION $STARTUP_PROJECT
      /p:UseSharedCompilation=false
    component: dotnet
    group:
      isDefault: true
      kind: build
    workingDir: ${PROJECT_SOURCE}
  id: build
- exec:
    commandLine: dotnet run -c $CONFIGURATION --no-build --project $STARTUP_PROJECT
      --no-launch-profile
    component: dotnet
    group:
      isDefault: true
      kind: run
    workingDir: ${PROJECT_SOURCE}
  id: run
components:
- container:
    args:
    - tail
    - -f
    - /dev/null
    endpoints:
    - name: http-dotnet60
      targetPort: 8080
    env:
    - name: CONFIGURATION
      value: Debug
    - name: STARTUP_PROJECT
      value: RazorPagesContacts.csproj
    - name: ASPNETCORE_ENVIRONMENT
      value: Development
    - name: ASPNETCORE_URLS
      value: http://*:8080
    - name: database-service
      value: postgresql
    image: registry.access.redhat.com/ubi8/dotnet-60:6.0
    mountSources: true
  name: dotnet
  attributes:
    container-overrides: {envFrom: [secretRef: {name: "postgresql"}]}
metadata:
  description: Stack with .NET 6.0
  displayName: .NET 6.0
  icon: https://github.com/dotnet/brand/raw/main/logo/dotnet-logo.png
  language: .NET
  name: myapp
  projectType: dotnet
  tags:
  - .NET
  version: 1.0.2
schemaVersion: 2.1.0
starterProjects:
- git:
    checkoutFrom:
      remote: origin
      revision: dotnet-6.0
    remotes:
      origin: https://github.com/redhat-developer/s2i-dotnetcore-ex
  name: dotnet60-example
  subDir: app
As you modify the devfile.yaml, you can check the terminal window where you have odo dev running. You should see that odo is automatically handling the changes and reloading the application.
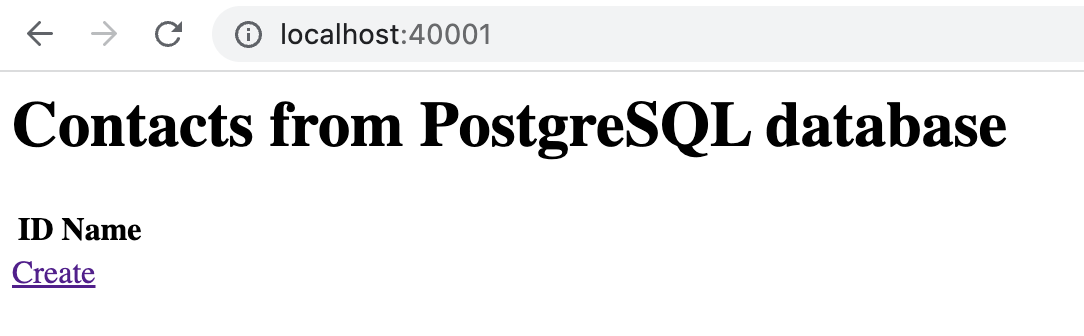
Now, refresh the local URL http://localhost:20001. You should see that our application is using the PostgreSQL database.